Creating your first Deputy Package
A new package can be initialized using the deputy create command. This command will prompt for basic information about the package.
Since a Virtual Machine is the basis for most exercises, let us create a VM (Virtual Machine) package for our first exercise.
deputy create
When prompted, select vm for the package type. All of this can be later changed manually as well.
After it has been created, by navigating to the package directory we can see that the package has been initialized with a src folder for our package files, a README.md which should contain an overview of the package that is also displayed on the Deputy website after it has been published, and a package.toml file that contains the package metadata.
my-first-package
├── package.toml
├── README.md
└── src
    └── // package files //
Before we can publish the package, we need to add some files to it. And fill out the remaining metadata. For this example, we will export a pre-made VM from our vSphere environment and add it to the package. To create your own, you can either make a VM from scratch or modify an existing one to your liking.
Exporting a VM from vSphere
There are two common ways to export a VM from vSphere. The first one is using the OVFTool, which is a command line utility for importing and exporting VMs from vSphere. The second one is manually exporting the VM from vSphere.
Remember to remove any mounted media such as .iso files before exporting, if they are not necessary for the VM to function, otherwise they will also be exported and needlessly bloat the size of the package.
Using OVFTool
- Running the following command will export the VM directly to an OVA file, it will prompt you for your vSphere credentials:
ovftool vi://<vcenter-ip>/<Datacenter>/vm/<Path/To/VM> /local-download-path/VM-Name.ovaExample:
ovftool vi://dev-vcenter.ocr.cr14.net/Dev-Datacenter/vm/Exercises/debian11-nmcli ./debian11-nmcli.ovaManually Exporting a VM from vSphere
- Open the vSphere Web Client and navigate to the VM you want to export. Right click on the VM and select
Template > Export OVF Template. Save them to a folder of your choosing. - Using the OVFTool, convert the OVF files to an OVA file. This can be done with the following command:
ovftool /path/to/local/file.ovf /path/to/local/file.ova
- Open the vSphere Web Client and navigate to the VM you want to export. Right click on the VM and select
Finalizing the package
Armed with our OVA file, we can now copy it to our package. The location is not important as long as its path is described in the package.toml file, but for this example we will copy it to the src folder of our package.
After our OVA has been copied, we need to fill out the following fields in the package.toml file:
operating_system- the operating system of the VM. Supported values are:
AlmaLinux, AmazonLinux, Asianux, CentOS, Debian, DebianGNULinux, EComStation, Fedora, Flatcar, FreeBSD, KylinLinuxAdvancedServer, MacOs, MiracleLinux, NeoKylinLinuxAdvancedServer, OpenSuse, OracleLinux, OSX, Pardus, Photon, RedHatEnterpriseLinux, RockyLinux, SCOOpenServer, SCOUnixWare, Solaris, SUSELinuxEnterprise, Ubuntu, Windows10, Windows11, Windows2000, Windows7, Windows8, WindowsServer2003, WindowsServer2008, WindowsServer2012, WindowsServer2016, WindowsServer2019, WindowsServer2022, WindowsVista, WindowsXP
architecture- the architecture of the VM. Supported architectures are:amd64,arm64,armhf,i386file_path- the relative path to the OVA fileaccounts- the available accounts for the VM. This does not need to be an extensive list, just the ones the exercise manager wishes to use in the exercise.default_account- the default account for the VM. - Deprecated, soon to be removed.categories- Optional. Add categories to the package to make it easier to find.
In the end the package.toml file should look something like this:
[package]
name = "debian11-network-manager"
description = "Debian11 CLI with network-manager, curl, wget installed."
version = "0.3.0"
authors = ["Developers [email protected]"]
license = "MIT"
readme = "README.md"
categories = ["debian", "nmcli"]

[content]
type = "vm"

[virtual-machine]
accounts = [
    { name = "root", password = "password" },
    { name = "user", password = "password" },
]
default_account = "root"
operating_system = "Debian"
architecture = "amd64"
type = "OVA"
file_path = "src/debian11-network-manager.ova"
readme_path = "README.md"
The package is now ready to be published. To do so, we need to first login to Deputy CLI using our unique Deputy Token with the deputy login command.
Note: This package already exists in the Digital Library and a new version of it cannot be uploaded unless you are assigned ownership of the package. However, a new package with a new name can readily be made.
Acquiring a Deputy Token
- Login to the Deputy website and navigate to the
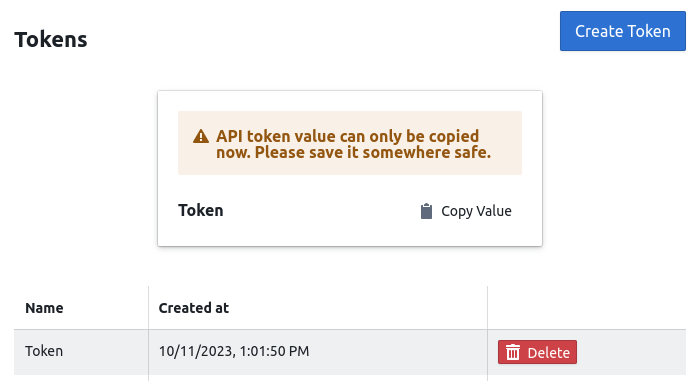
User > Tokenspage. Click on theCreate Tokenbutton and give it a name. Copy the token to your clipboard.
- Login to the Deputy website and navigate to the


Note: As with other tokens, it can only be viewed once. If you lose it, you will have to create a new one.
Logging in to Deputy CLI
- Run the
deputy logincommand and paste the token when prompted.
- Run the
Publishing the package
- Run the
deputy publishcommand in the package's directory. This will upload the package to the Digital Library and can be viewed on the Deputy website. - If you wish to update the package. You have to change to version number in the
package.tomlfile and run thedeputy publishcommand again. - If you wish to remove the package, you can do so by running the
deputy yankcommand.
- Run the